Advanced Network Settings - Static IP, Whitelist and MAC filtering
These setting takes place on a router or firewall, and are intentionally specified by the network administrator.
Whitelisting or URL Filtering
This setting restricts the websites that can be accessed on the network. If your network has this restriction, you’ll need to add the following sites to your approved list:
- *.autonettv.com
- *.google.com
- *.googleapis.com
- *.googleusercontent.com
- *.google-analytics.com
- *.amazonaws.com
- *.azure.microsoft.com
MAC Address Filtering
This setting is similar to the Static IP Address discussed above, but requires entry of a device’s MAC address (unique to every computing device in the world) into your network router.
If your network requires MAC filtering, you need to add the MAC address of the player into your router. The Ethernet MAC Address is found on a silver sticker on the side of the player, to the left of the Serial Number sticker - as shown here:

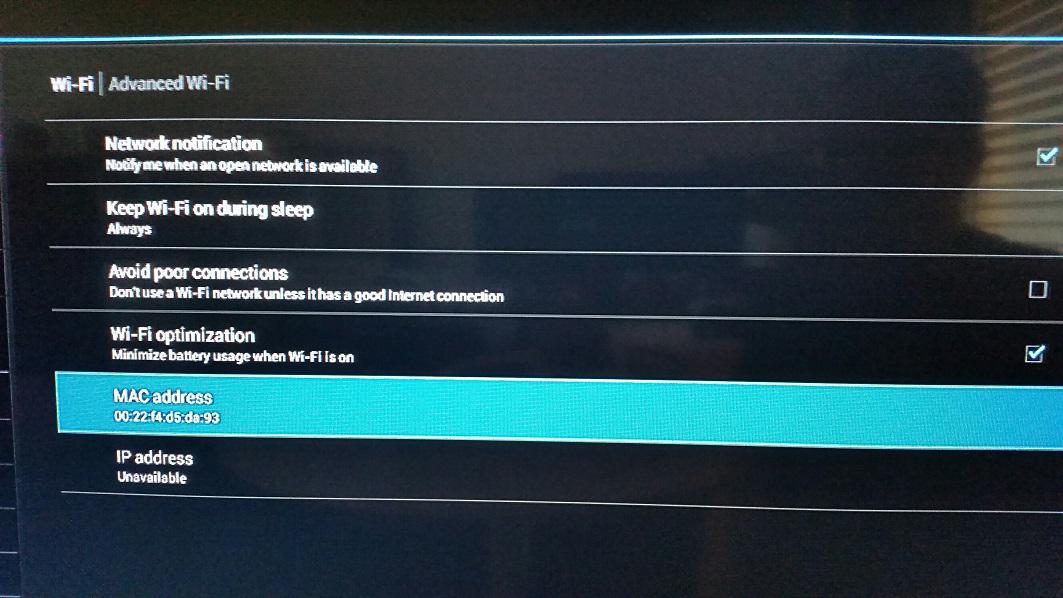
The Wireless MAC Address is found inside the Advanced Settings of the device. To find this information, follow these steps:
Step 1 - Using the included remote control, click the Menu button (top left button on the remote control), then choose Advanced Settings, then Screen Settings.
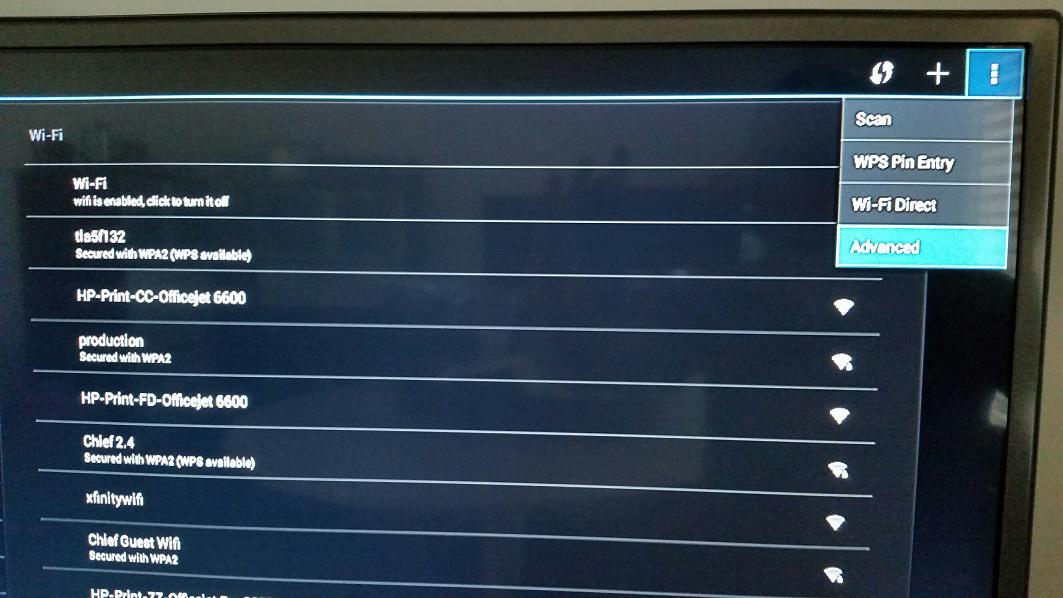
Step 2 - In the Settings menu that opens, use the up/down arrows on the remote to highlight Wi-Fi shown at the top of the screen and click the OK button. Then, press to the right, then up, and then to the right two more times to highlight the 3 button menu icon at the top right of the window.

Step 3 - Click the 3 button Menu icon, then click on Advanced.
Step 4 - in the new screen that appears, you'll see the MAC address towards the bottom.
Static IP Address
These usually are obtained by paying a certain $ amount per month to your internet provider for a block of specific IP addresses (such as 74.125.239.35) that act similar to phone #s – there can only be one assigned to each device, and once one is assigned to a device it cannot be assigned to another device. If your network requires a Static IP address to be assigned to each device, then you need to have an extra Static IP available to assign, you must know what that available address is, and you must enter it in the Connectivity Settings of the device. To enter the Static IP settings for your network, follow these steps:
Step 1 - Using the included remote control, click the Menu button (top left button on the remote control), then choose Advanced Settings, then Screen Settings.
Step 2 - In the Settings menu that opens, use the up/down arrows on the remote to highlight Wi-Fi shown at the top of the screen and click the OK button. Then, press to the right, then up, and then to the right one more time to highlight the large + icon at the top right of the window. (NOTE - For Ethernet / Wired connection, simply choose Ethernet, then arrow to the right and click Static IP Settings. There is no need to Add a network for Ethernet configuration).

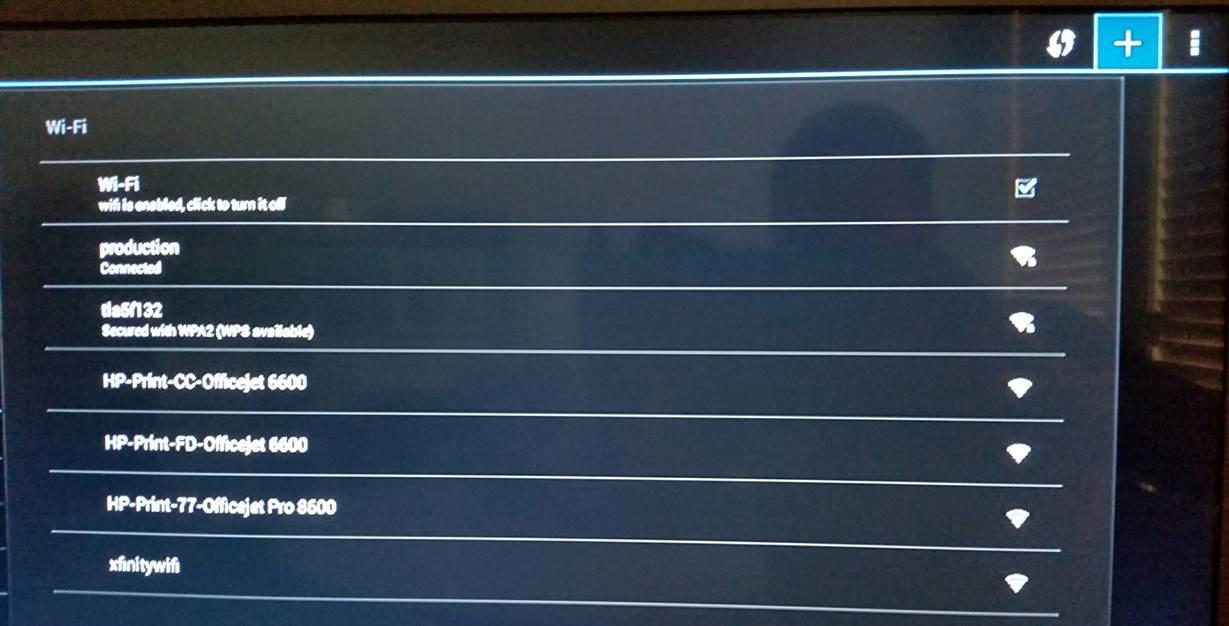
Step 3 - Once you've clicked the + icon at top right, an Add network screen will appear. Type in the name of your wireless network/SSID and choose the Security type.
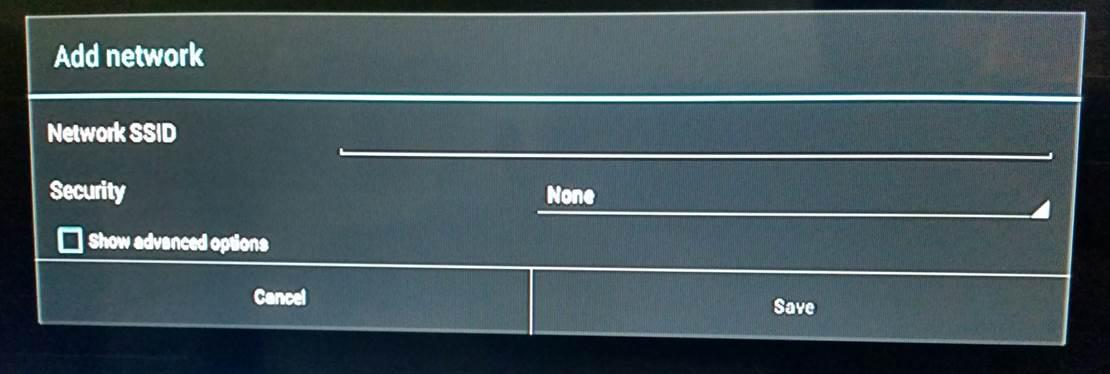
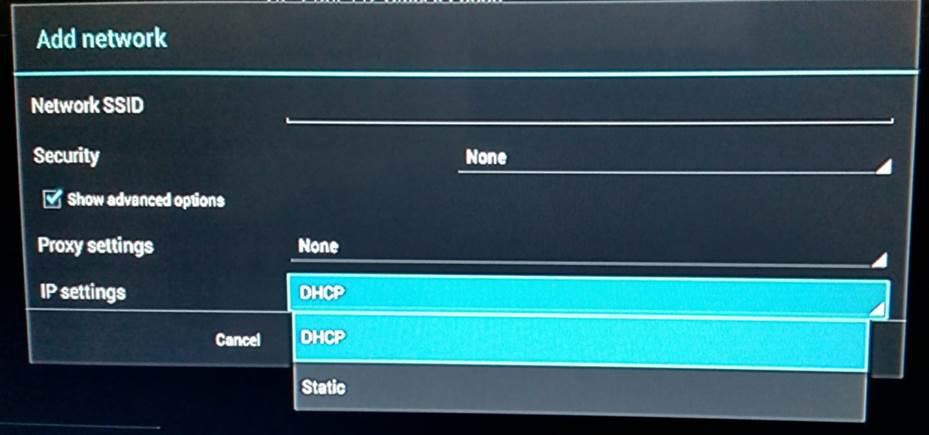
Step 4 - Highlight the box next to "Show advanced options" and click OK. This will open additional IP Settings (as shown below). Choose Static.
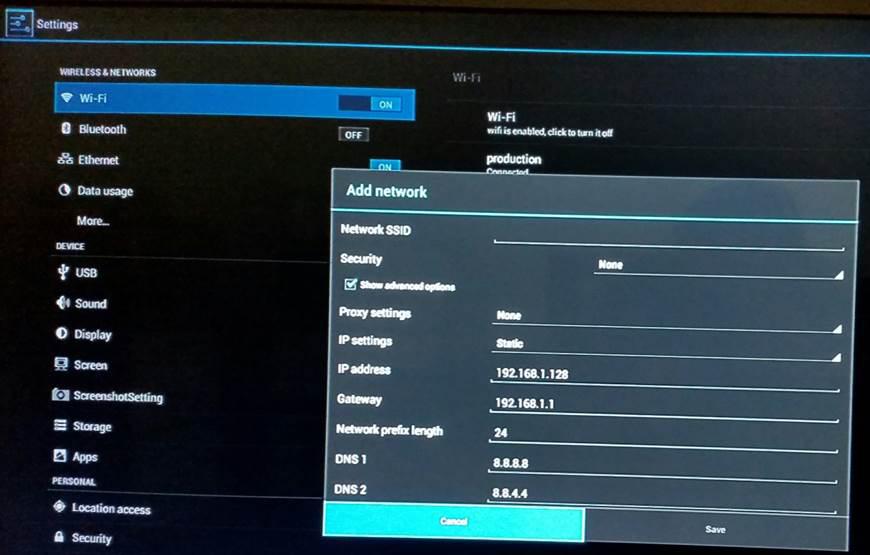
Step 5 - Enter your Static IP address, Gateway, etc, and then click Save to apply these settings to your wireless network.
If you still have problems connecting to your network, please contact your Internet Service Provider, or your network administrator.
Customer support service by UserEcho

