1st Time Login - Setting Up Your AutoPilot in Dashboard (the Onboarding Steps)
The 1st time you login to your account at http://Drive.AutoNetTV.com, follow the steps listed below to setup your AutoPilot - if it has not already been done for you by one of our AutoNetTV account reps. When you login, just click the big green AutoPilot Setup Wizard, shown below.
Here we'll show you how to complete your Onboarding steps to setup your AutoPilot feature for your Drive Menu Board or Lobby TV subscription. AutoPilot is especially helpful for Menu Board subscribers - since it will automate your service and pricing details and rotate your content automatically each month. This smart program finds content, based on the color scheme you choose, the services you offer, and any pricing you specify (for Menu users), and then builds a smart playlist for you that updates each month. The playlist is varied with different content layouts and types to provide variety throughout the loop - to generate better customer response to content displayed. You can still add individual assets into your playlist as much as you want - in addition to the content added for you automatically by AutoPilot.
To begin, click the Get Started Setup Wizard button on your Dashboard home screen.
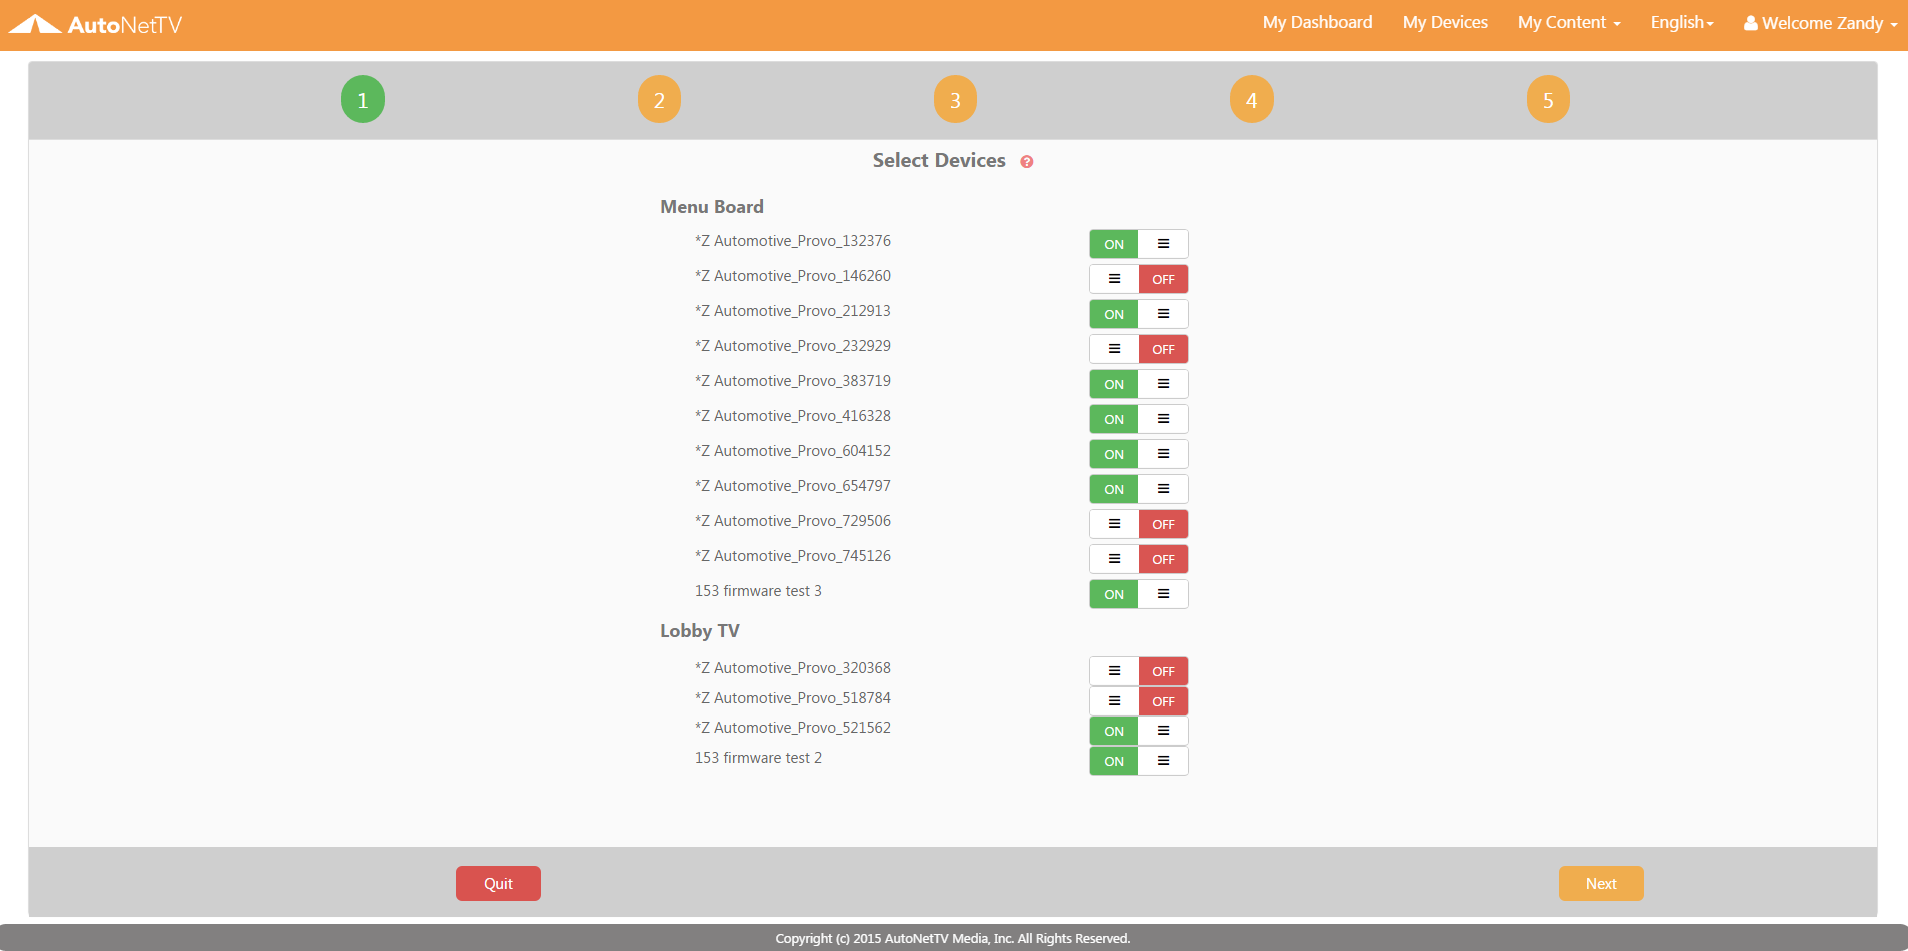
Step 1 - choose the devices for which you want these settings to apply. This is an either/or option - these settings will apply only to the devices you choose, and will not apply to those you do not choose. You do not have more than 1 set of variables for AutoPilot. If you add a new device later, or change your mind about these settings applying to a device, you can come back to this step and change the On/Off setting and then click the last step and Save your settings. In other words, any edits you decide to make to your setting, after you've completed this first round of initial settings, can be made by just going to that step and changing its settings, and then hitting Save on the final step. You will not need to go through every step each time.
Once you're done with each step, you can click the round Step # icon at top to move to the next one, or click the Next button at the bottom.
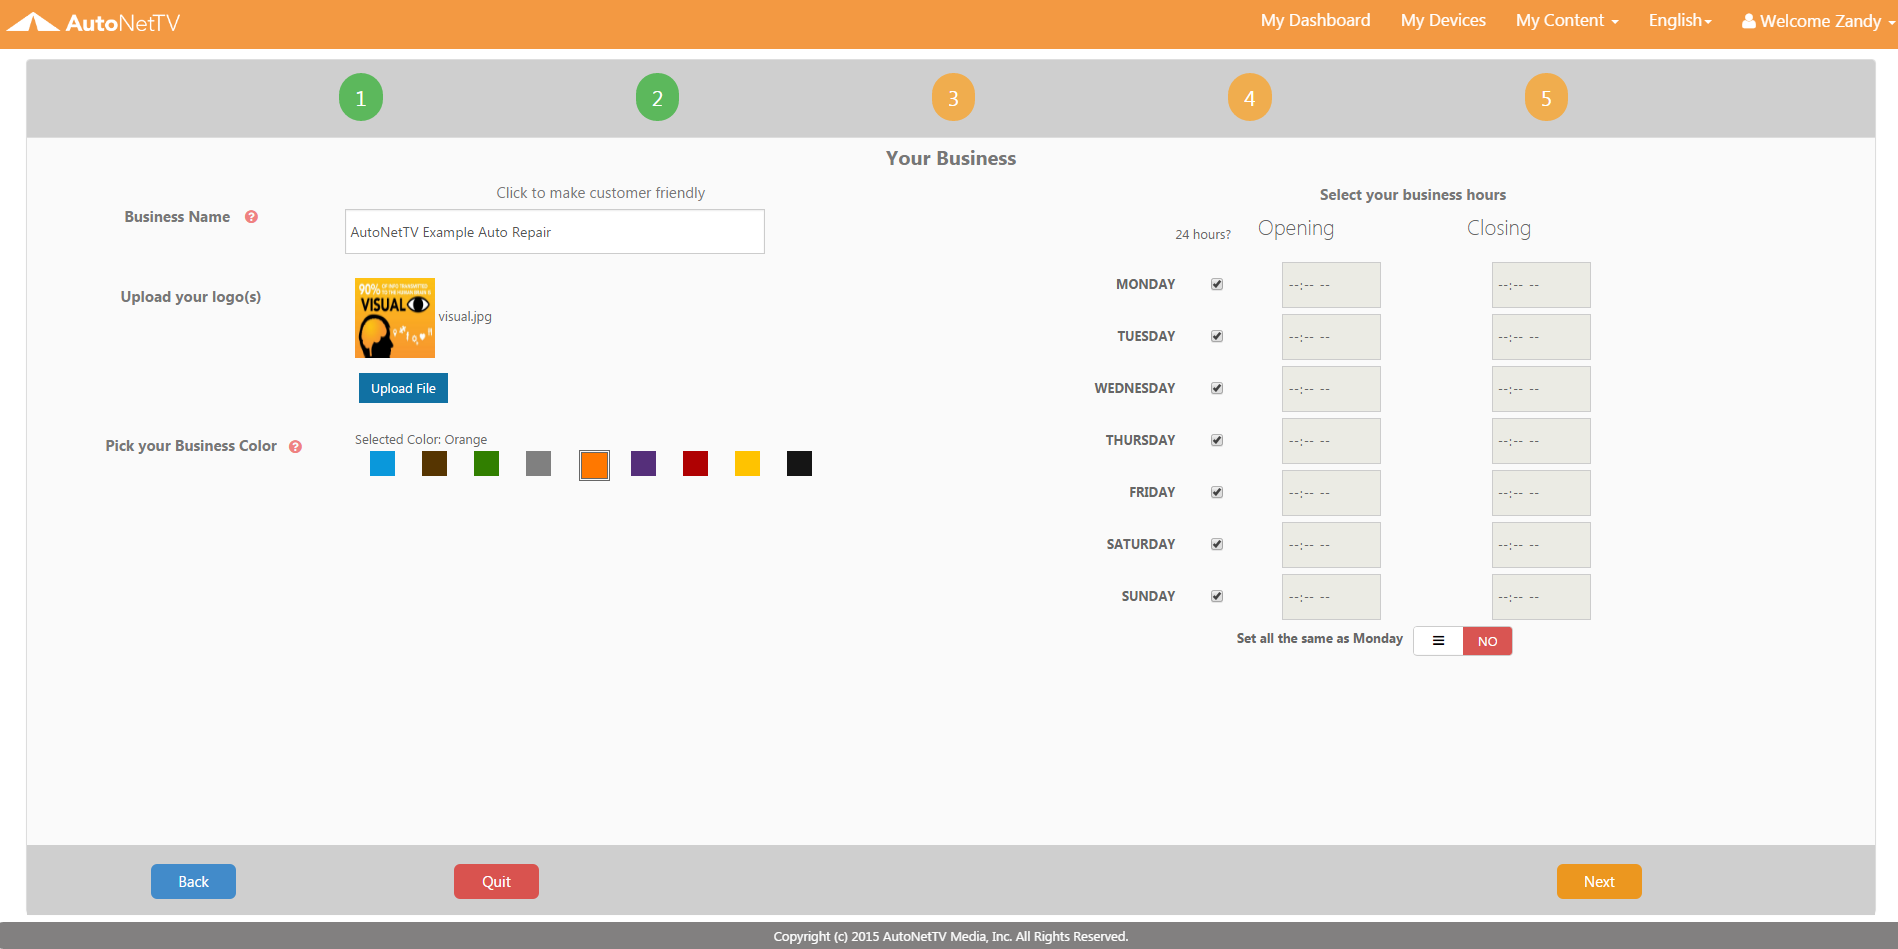
Step 2 - enter the basic information about your business. For the name - it's a user friendly version, such as "XYZ Auto" instead of "XYZ Store # 3576". Upload your logo - even if you've already uploaded your logo previously in the User tab. This logo assignment will flow through to all of your AutoPilot content. Choose the color that most closely matches your primary business colors, and then enter your business hours.
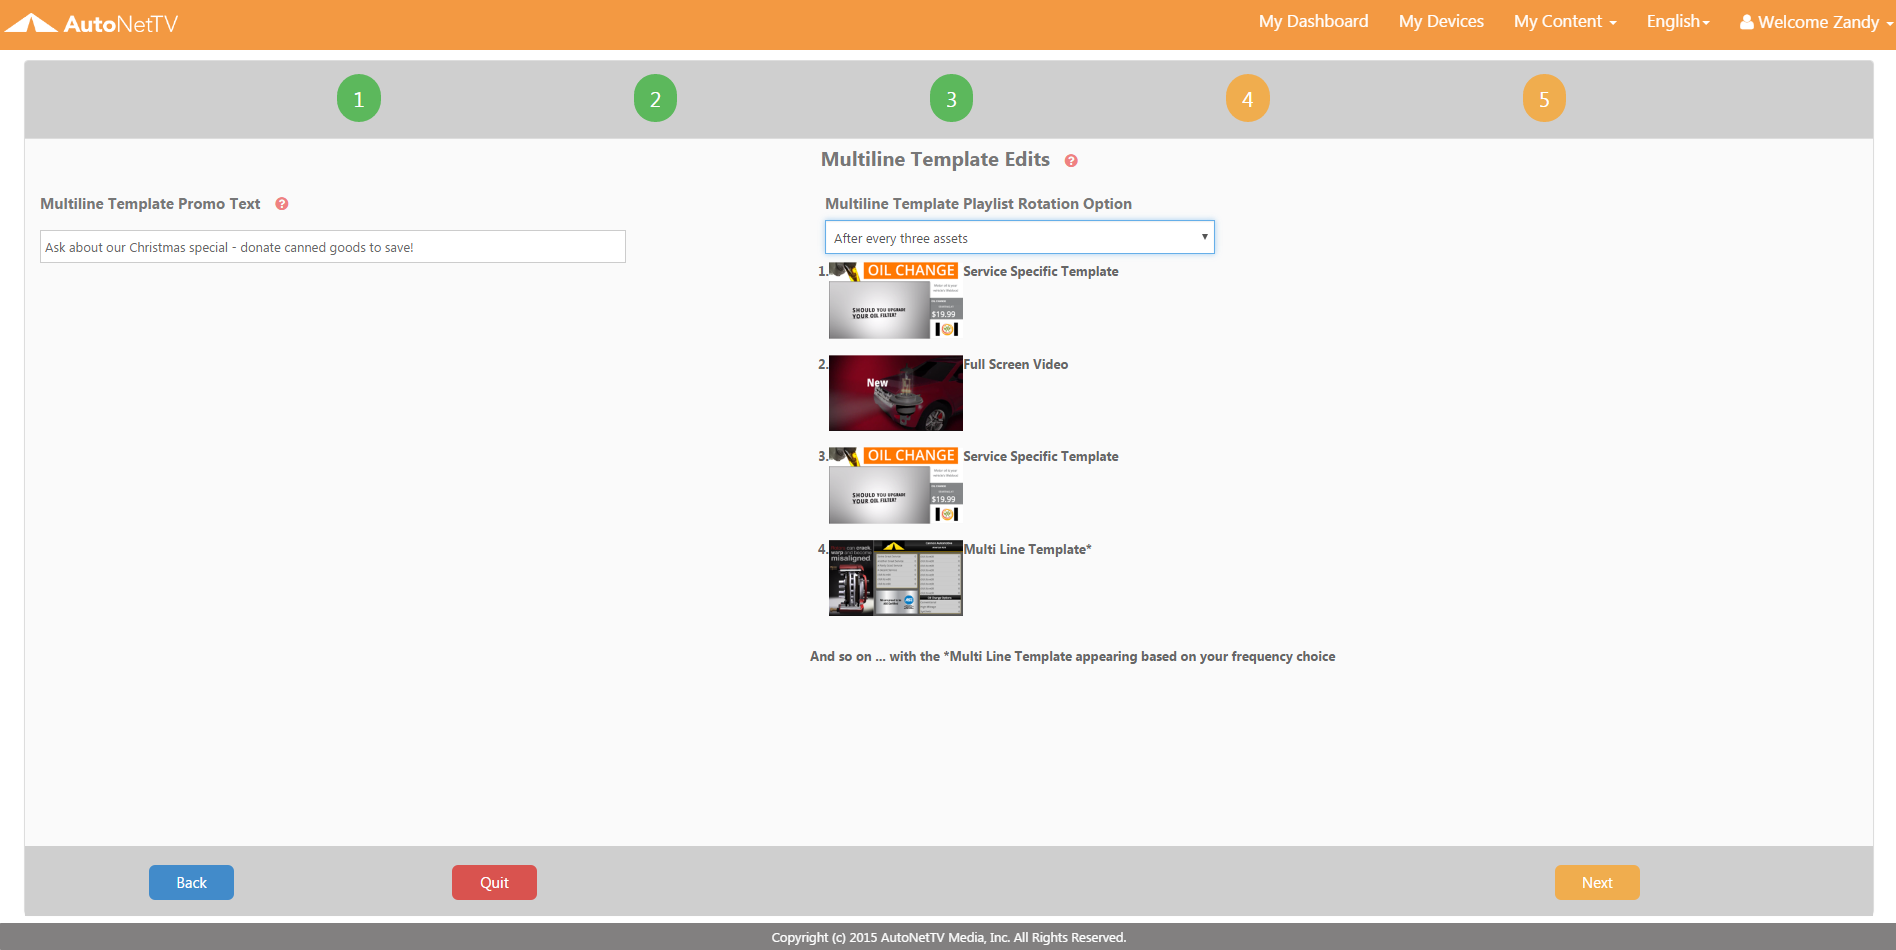
Step 3 - enter a promo text line that will flow through to your templates (such as "Ask about our Customer Loyalty Card"). Next, choose how often you'd like a Multi-line Template to appear in your Menu Board playlist. Multi-line templates list 15 services and their corresponding prices, along with your logo, promo text, images, and videos in one template. Most users will pick every 5 assets - to provide greater flow and variety to the program mix. This would mean that 4 service specific templates and/or full-screen videos will play on screen, followed by a multi-line listing of services, and so on throughout the loop.
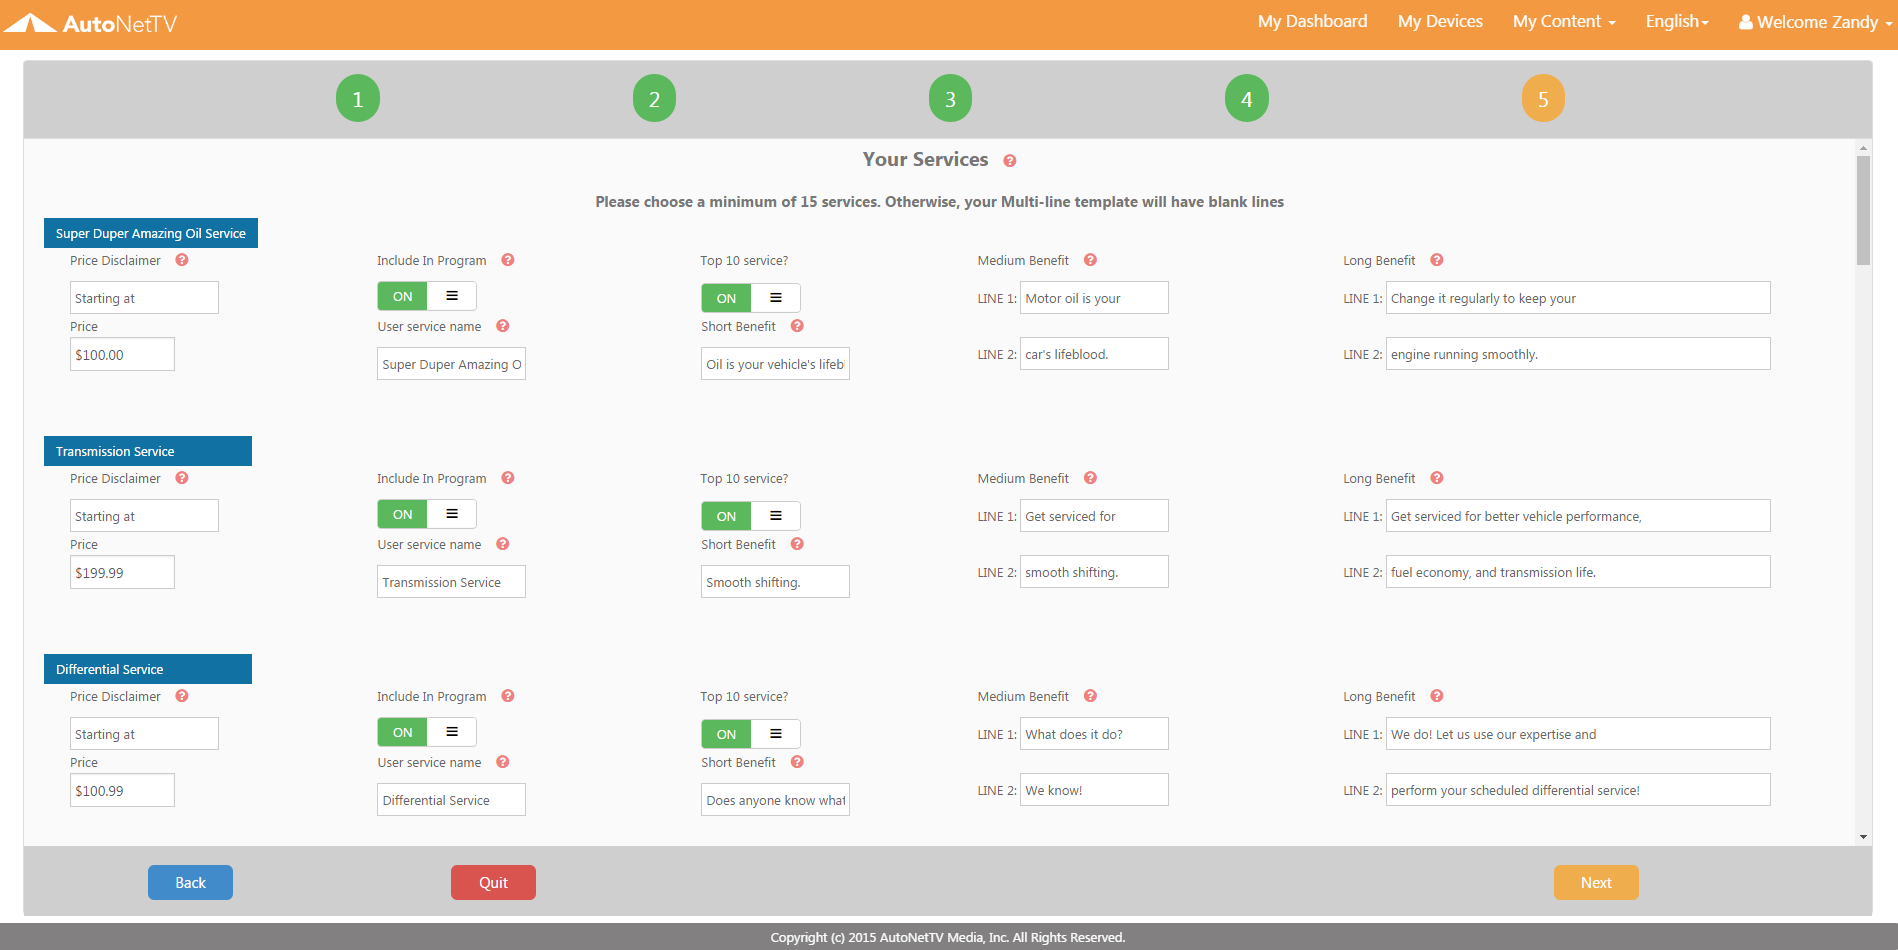
Step 4 - this contains a list of the most commonly performed services in the industry (based on statistics from industry magazines). Click the blue box to expand any of the services. If you offer the service, turn the Include In Program switch to On. This will add this service (both as text in the Multi-line template, and as its own video or service template) into your playlist. You can give a price disclaimer that will appear on your service template. You can add your price or not - this can include a currency symbol, or a short text, such as "Ask Us".
You also have an option for Top 10 Service. This identifies the most important services you wish to promote, and ensures that the text and price for this is always included in your Multi-line template. Any services not checked as Top 10 will still appear as content in the program, but will be rotated each month for the additional 5 text lines in the Multi-line template. You can change those services that are marked as Top 10 each month, if you'd like, or keep it the same forever.
You have other editing options, such as changing the name of the service (e.g. Oil Change can be "Super Awesome Oil Change Service") - which will flow through to the content on your screen. We've also created sales text for every service option available to you. The text is designed to be short, sweet and to the point - yet catchy to grab a customer's attention. You can edit any of these in the Short, Medium and Long Benefit input lines. You can see samples of where this text will appear on your screen.
Step 5 - the final step ... just make sure the switch is set to On, and then click the Save button at the bottom of the screen to aply your Onboarding settings and activate AutoPilot to your device(s). Once the settings have saved and applied, you can switch to the Classic View to see the new assets added into your program playlist.

The system instructions, schedule, and content will then be sent to your device(s), which will automatically download the new content and then begin playing it all on your screen.
All done! If you want to follow some more tutorials for new users, you can learn all the cool features and basics by clicking here http://autonettv.com/newuser.
If you have other questions, please search by any words or topics at http://support.autonettv.com/ to find helpful information.
If you still have questions or need help, you can call us at (801) 492-9900, option 3, from 7 am - 5 pm (M-Th), and 7 am - 1 pm Fri, Mountain Time.
Customer support service by UserEcho