Error - Can’t connect to your wireless network
If the media player can't connect to your wireless network, please check the following:
1) Did you choose the right wireless network name? Some businesses have more than one wireless network. NOTE - we recommend you do not connect using an open or Guest wireless network. For improved performance and security, we recommend you use a secure network.
2) Is your password entered correctly (passwords
are case-sensitive)? If you don’t know
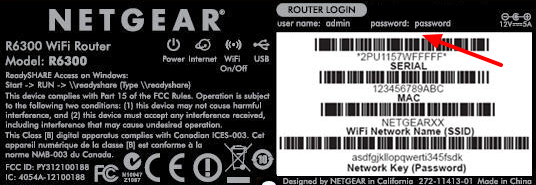
your password, try looking on the side or bottom of your router – it may be
labeled Network Key (see example below). If you use a Wi-Fi router provided by your Internet Service Provider, you may be able to contact them for help recovering or resetting your Wi-Fi password. If you use your own Wi-Fi router, or had someone else set it up for you, you can contact your network administrator or the person who setup your network to find or reset your password. You may also be able to see the password by looking at the settings on another device that is connected to this network, and checking to Show Password.
Example of a router label showing its default password:
3) Can other devices connect to this network (phone, tablet, laptop, etc)? Confirm that your Internet connection is working by attempting to connect using another device. BUT FIRST – if your other device, like a phone, is already connected to your network, be sure to Cancel and Forget your existing connection first. Then try to connect after entering the information again. This often helps you discover if your network requires additional authentication (see below), or some other information.
4) Does your router block unknown MAC addresses? If so, you need to add the MAC address of the player into your router. Follow these steps to find the wireless MAC address of the player:
Step 1 - Using the included remote control, click the Menu button (top left button on the remote control), then choose Advanced Settings, then Screen Settings.
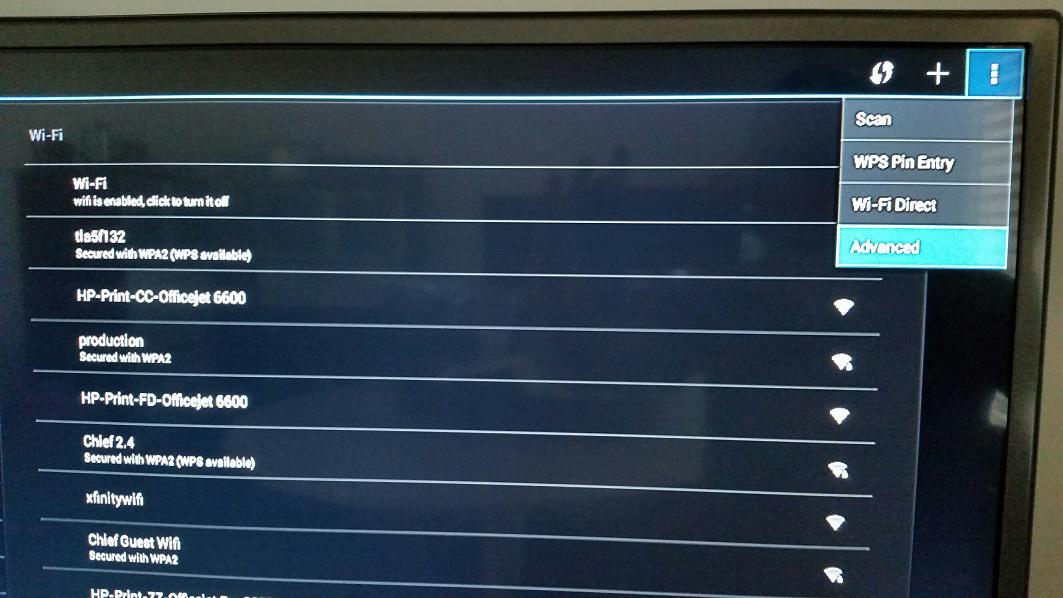
Step 2 - In the Settings menu that opens, use the up/down arrows on the remote to highlight Wi-Fi shown at the top of the screen and click the OK button. Then, press to the right, then up, and then to the right two more times to highlight the 3 button menu icon at the top right of the window.

Step 3 - Click the 3 button Menu icon, then click on Advanced.
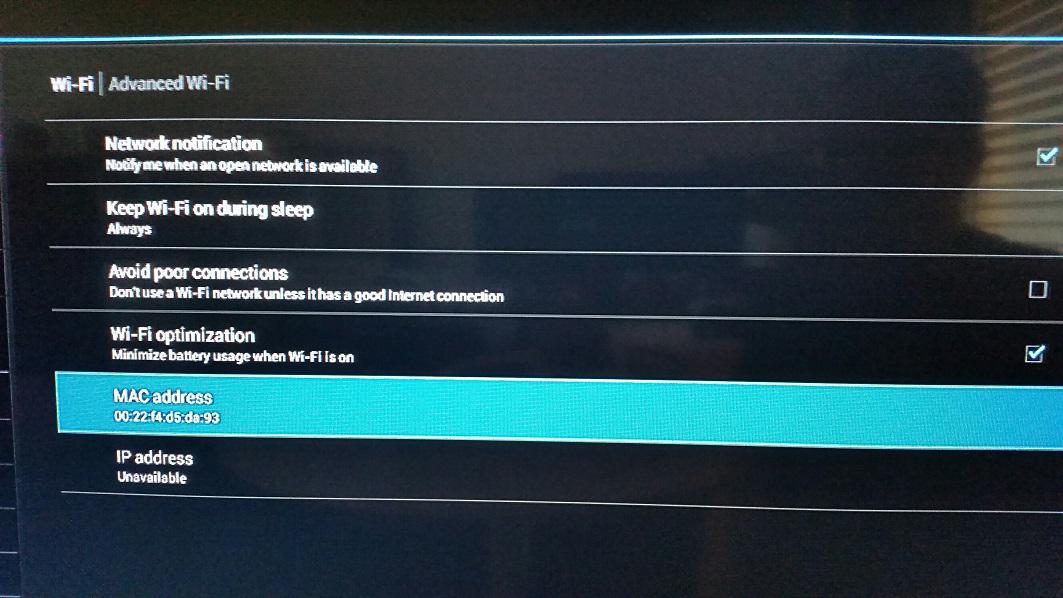
Step 4 - in the new screen that appears, you'll see the MAC address towards the bottom.
5) Does your router use Static IP addresses? If so, you will need to enter this
information into the setting of this device.
To do this, follow these steps:
Step 1 - Using the included remote control, click the Menu button (top left button on the remote control), then choose Advanced Settings, then Screen Settings.
Step 2 - In the Settings menu that opens, use the up/down arrows on the remote to highlight Wi-Fi shown at the top of the screen and click the OK button. Then, press to the right, then up, and then to the right one more time to highlight the large + icon at the top right of the window.

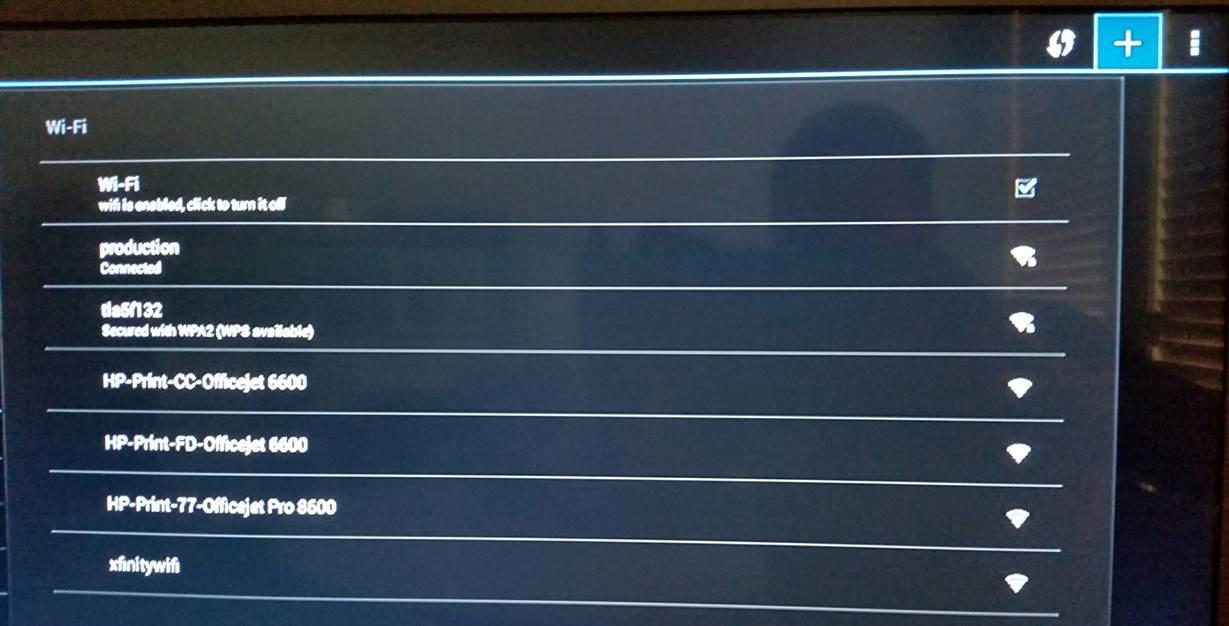
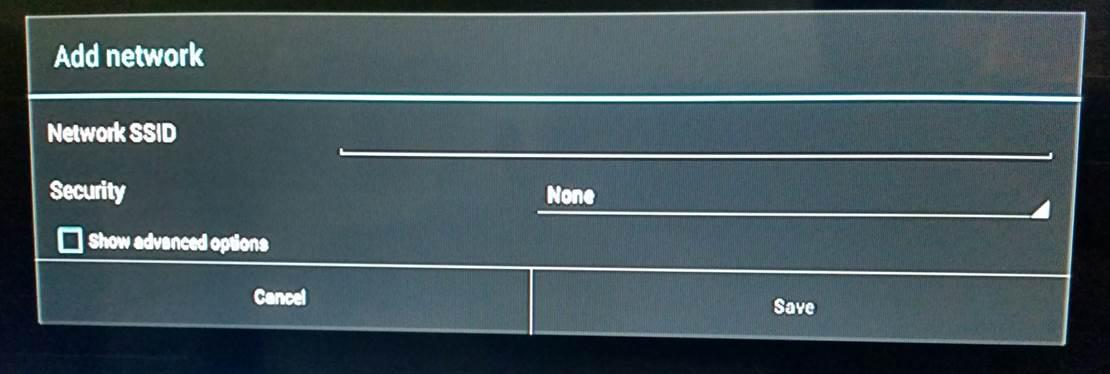
Step 3 - Once you've clicked the + icon at top right, an Add network screen will appear. Type in the name of your wireless network/SSID and choose the Security type.
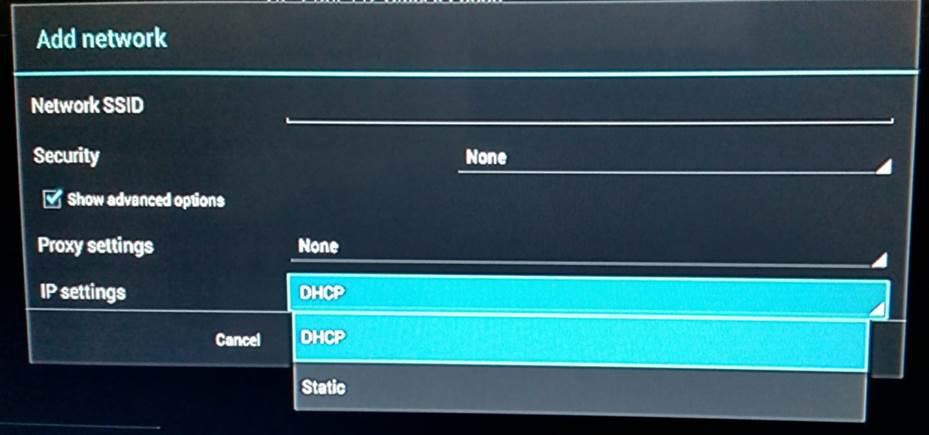
Step 4 - Highlight the box next to "Show advanced options" and click OK. This will open additional IP Settings (as shown below). Choose Static.
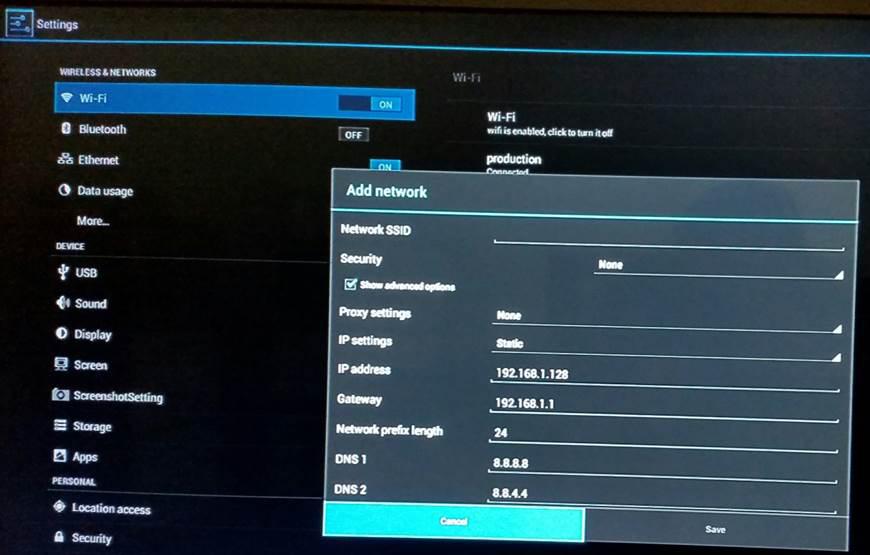
Step 5 - Enter your Static IP address, Gateway, etc, and then click Save to apply these settings to your wireless network.
If you still have problems connecting to your network, please contact your Internet Service Provider, or your network administrator. You can also call our Customer Success Team at (801) 492-9900 to provide assistance - but please note that our team cannot see your network and is not responsible for its settings or configuration, and thus may not be able to resolve your issue.
If you still have questions or problems, you can search for more help topics above, or send us an email at techsupport@autonettv.com.
Customer support service by UserEcho