Editing My TV Program
To start editing your Lobby TV program, click on the TVab in the subscription section of the Home Screen (right side of the screen).

Once you see your TV device(s), you can click Preview to see what the program will look like on your screen. You can also click the left and right orange arrows to go back or forward to the previous or next item in the playlist.
When Previewing your program, notice that you have orange arrows at the top - which enable you to move forward to the next content in the program, or go back to the previous. When you're done previewing, click the Close button at the bottom. You can also click the button to preview the Employee program (for viewing before and after business hours).

To add an asset into your TV program, simply find it in the Media Content section on the left side of the screen, click and hold your left mouse button, and then drag the thumbnail of that asset to the right into a spot in the program (as shown below). Any assets already in the playlist will move to create an opening. You can drag a file anywhere you'd like into your program. And, once a file is in the playlist, you can click and drag it up or down to rearrange its order in the playlist.
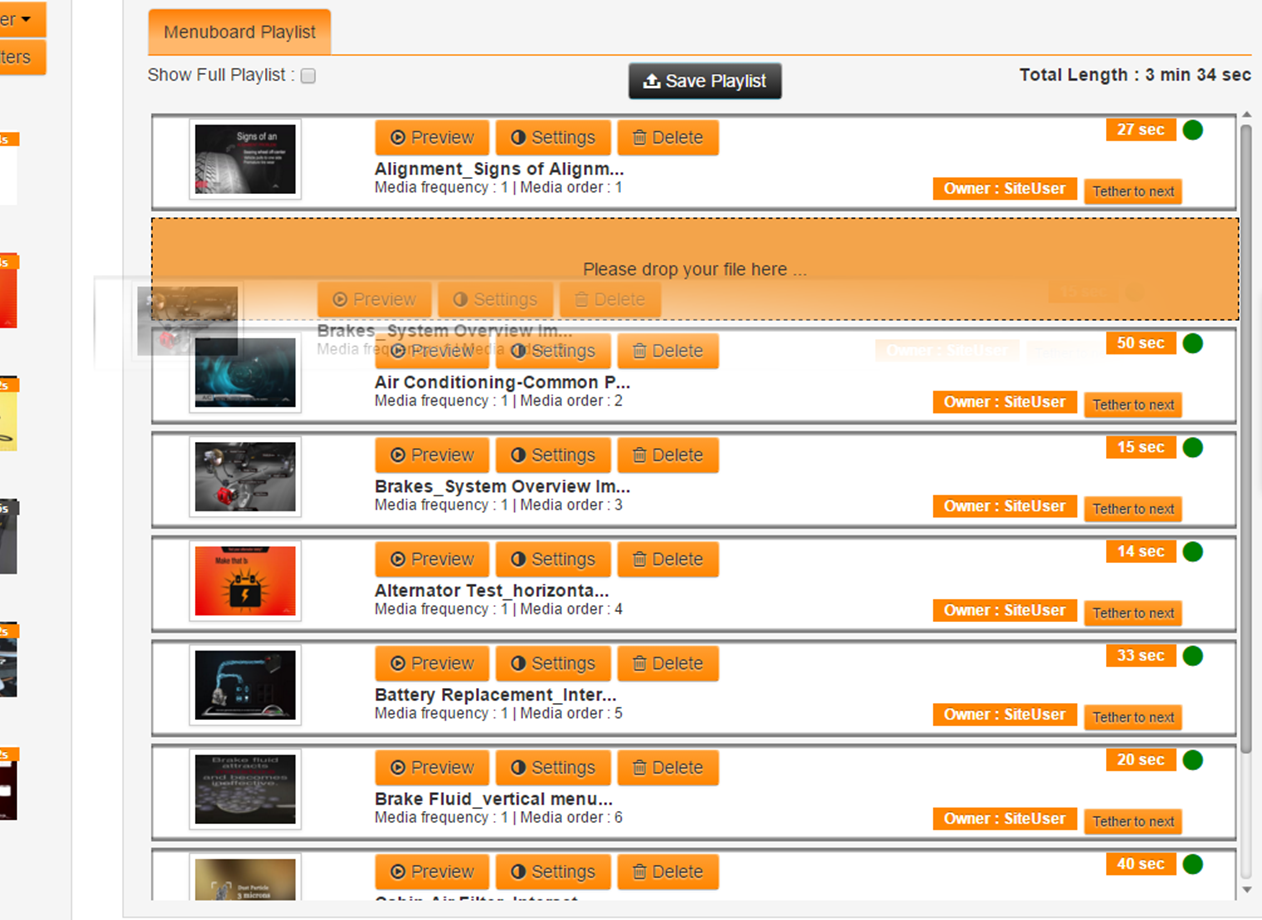
Once an asset has been added to the program, you have options for editing it as well. Click the Settings button on the asset block in the playlist to access these functions.
For an Image file, you'll have the ability to change the Duration (which is 15 seconds by default). (TIP – if an image is on screen by itself for too long, it won’t look good)
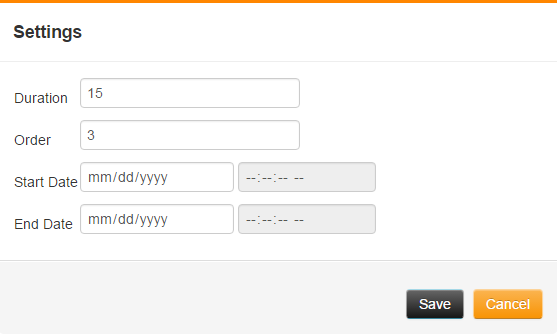
For all assets, you can change:
- Order - this is the place where, in the playlist, the item will appear in order. Simply type in a new # and hit Save and the asset will move to that spot (if that # exists). This is just another way to re-order, besides dragging an asset block up or down.
- Start Date - If you want an asset to begin on a specified date (for example - on February 1st for a Valentine's special), then enter that start date here. You can also specify the time, or leave it blank for the asset to play all that day.
- End Date - If you want an asset to end on a specified date (for example - on February 14th for a Valentine's special), then enter that end date here. You can also specify the time, or leave it blank for the asset to play all that day. Note - you do NOT need an end date for an asset - you can have it start and then play forever after that date.
Once you add Date Settings to an asset, those start/end dates will be added to the asset block description. If Today is not during the set date range, you'll see a Red Dot next to the asset time - telling you it is not playing in the program today.

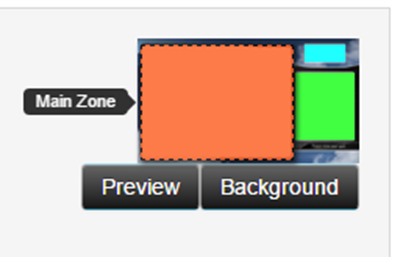
As shown in the Preview screen above, the Lobby TV program is broken out into 4 zones:
- Main Zone - this is the largest window of content where the videos play. This playlist will loop.
- Logo Zone - images that rotate in the top right window. This playlist will loop.
- Side Zone - images to promote products or services in the right side panel of the screen. This playlist will loop.
- Background - a wrapper to make the entire content delivery look clean and appealing. This is not a playlist - only one image asset will stay on screen the entire time.
You can access each of these zones by clicking on its respective colored area in the diagram at the top right of the screen. The zone you have selected will be outlined with a black dotted line.
When you click each respective Zone, the AutoNetTV Media Content section will automatically update to show you the content that is tagged for that zone.
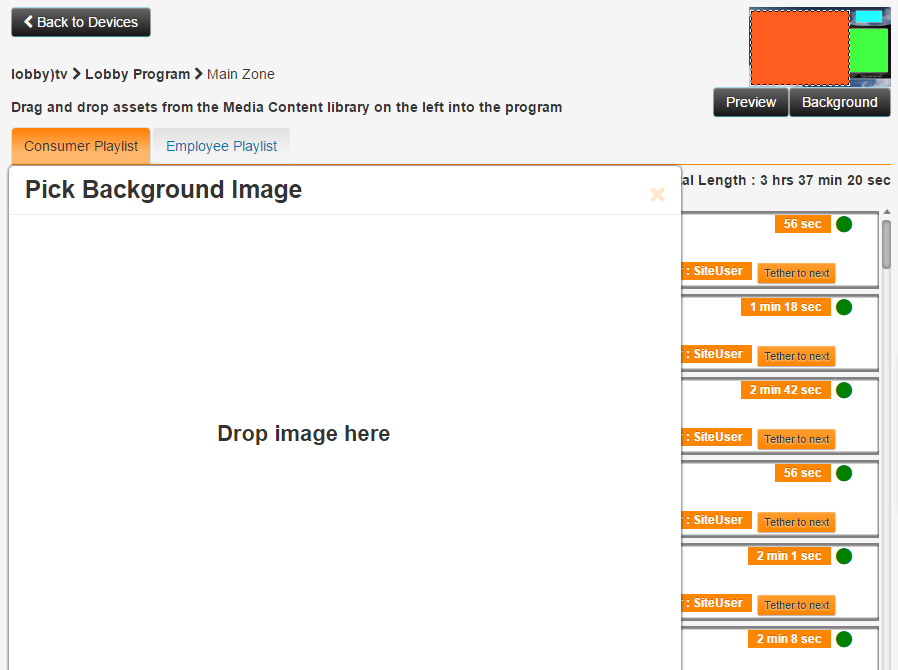
To change the Background, simply click the Background image, and then drag-and-drop the image you want into the white area noted.
To remove an asset from the playlist, just click the orange Delete button next to it in the playlist.
Remember to choose Save Playlist for your settings to take effect. If you have more than one Menu device, you'll be prompted with another question:
- Save to All Devices - this will apply your changes to all of your TV devices within this login account equally. This saves you from having to manage the program multiple times. NOTE - this will only apply the changes to other TV devices in your account, not devices for different subscriptions (such as Menu Board).
- Save Playlist - this will only apply your changes to this one device, and not any others within your account
If you want to follow some more tutorials for new users, you can learn all the cool features and basics by clicking here http://autonettv.com/newuser.
Customer support service by UserEcho