Uploading Content
To upload any of your own content from your computer (videos, images, etc), click on your User Media Content tab. In the top right corner of the User tab you’ll notice a button labeled Upload. Click on this button to open the Upload dialog window.

Click Select Files to find the assets you want to upload from your computer. These files must be saved on your computer or network/server drive before you can upload them (you cannot enter a URL or web address to upload content). If you want to add many files at the same time, just hold down the Ctrl button on your keyboard and click each file.
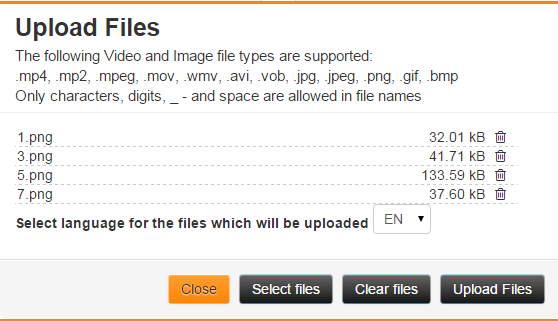
Once you've added the files you want, you'll still have several options before uploading. Next to each file, you'll see a trash can that allows you to remove that file, individually, before uploading. You can also click Select Files to get more files from your computer, or Clear Files to start all over.
Once you're happy with the files you've selected, click Upload Files to begin the upload process. The amount of time this takes will depend on your internet connection speed.
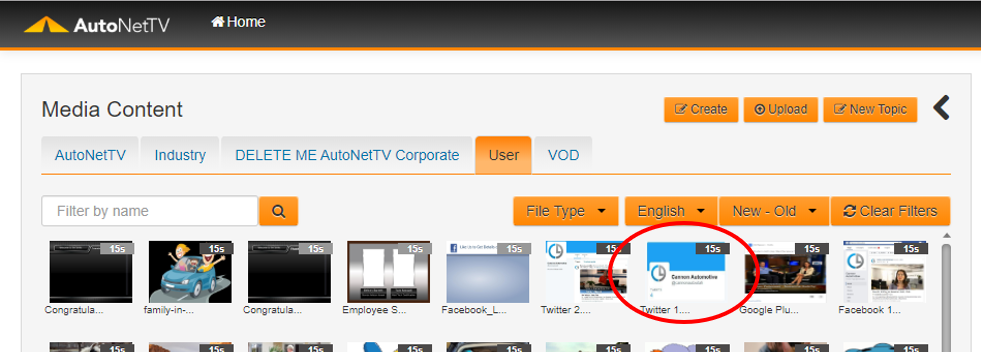
Once your files have processed, the system will take about 30 seconds to render the content and create a thumbnail. All files you upload will be found and stored in your User tab of content.
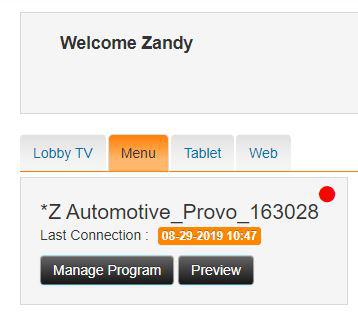
On the right side of the screen, choose the Program into which you want to place your uploaded videos or images. You do this by clicking on the Lobby TV or Menu tab, and then choosing Manage Program for the device on which you want to display the content.
Once your file appears in your User tab, click on it with your left mouse button and hold your mouse button down. This will select the asset (video or image) and allow you to drag it to your program on the right of the screen.
You can drag the thumbnail of the file anywhere into the playlist /program on the right side of the screen. Let go of your left mouse button once you see the orange block with the words "Please drop your file here ...".

You can move the asset in its position in the program, click Settings to change the dates during which it will play, or even repeat the drag-and-drop step several times to add the file into your program several times.
If you wish to delete a file you've uploaded, simply click on its thumbnail one time and you'll see a gray X in the top corner. Click this to completely remove the file from the Drive system. Any spot where that asset was located in a playlist will also now be removed.
If you want to follow some more tutorials for new users, you can learn all the cool features and basics by clicking here http://autonettv.com/newuser.
Customer support service by UserEcho