Finding Content - search, keyword filters, and file type
New Keywords Introduction Video
In the Media Content section, you’ll see the four tabs – AutoNetTV, User, VOD and Industry. Under each tab you’ll see an input line for you to “Filter by name” - which is a Search Toolbar. Simply begin typing any word, such as “brake”, and pressing Enter on your keyboard or by clicking the magnifying glass. You’ll see the system automatically begins filtering for any asset (video, image, etc) that has the word “brake” in the name.

- File Type - All, Video, Image, HTML (custom content templates created for menu board devices), and Topic (for the tablet product).
- Language
- Sorting Filter - this allows you to sort by the date an asset was created, or by alphabetical order.
- Channel - Consumer (for your customers) or Employee (for the pros at your business)
- Subscription Product - Lobby TV, Menu and Table - each with its various zones of content, and types of assets.
- Service Category - sorted by the area of vehicle for products and services, or by class (such as Maintenance and Repair vs Collision).
- Clear Filters - erases any/all of your filter settings and starts all over showing you the default of all content.
This image shows you several content filters that have been applied to display content results.

You can click the X next to any of the filters to remove it from your sorting. Or, you can click Clear Filters to start over fresh.
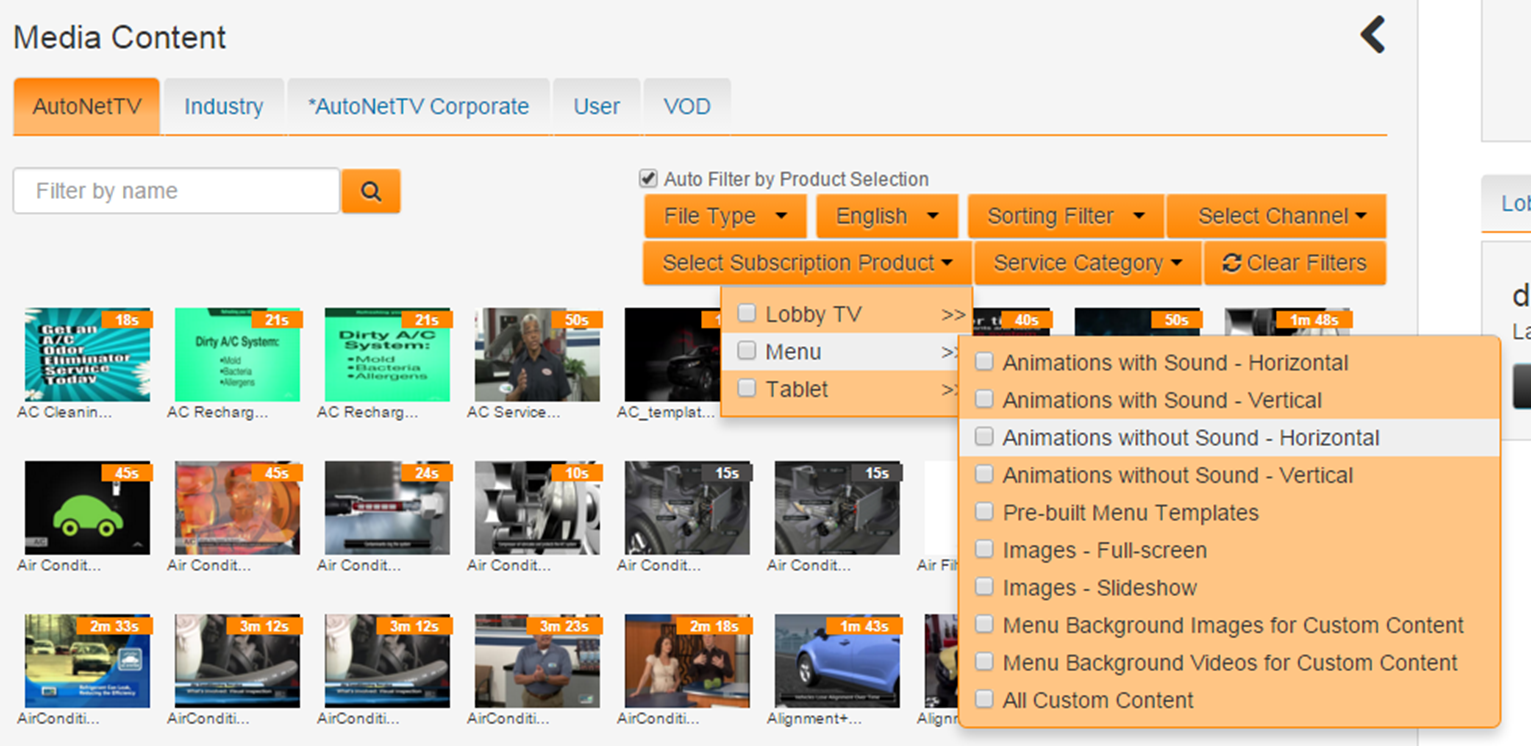
This image is an example of finding content by the subscription product (specifically Menu product, animation videos without sound that are horizontal in design).
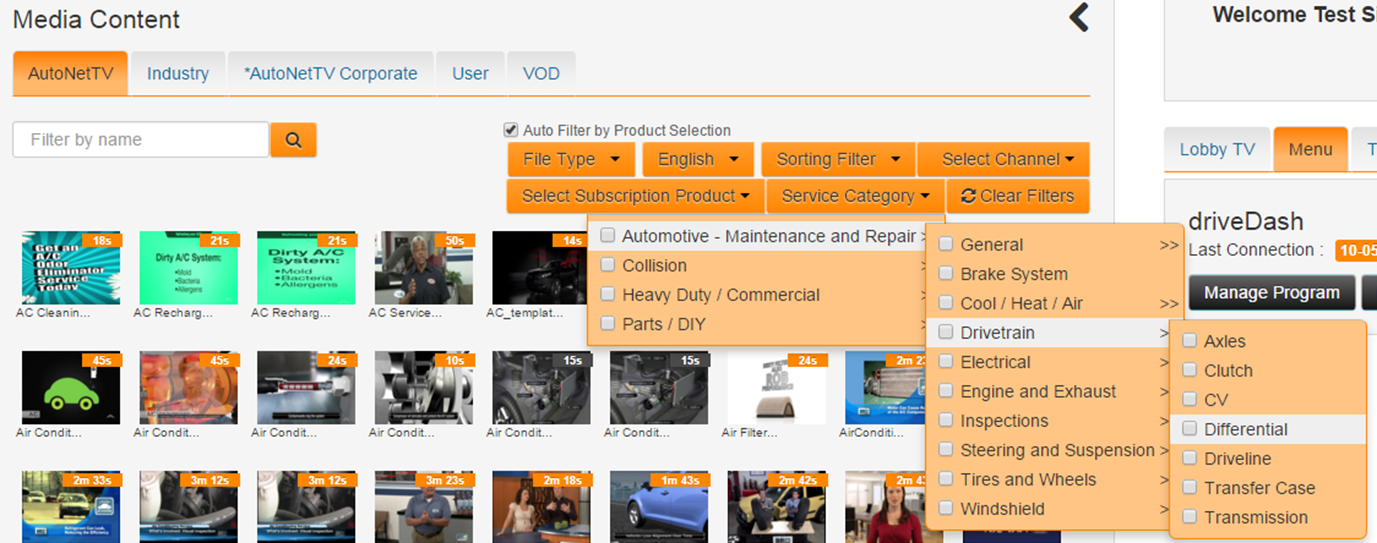
And this is an example of sorting for content by the service category (specifically Maintenance and Repair content, related to Drivetrain, discussing Differential).
These sorting features can help you to quickly find the right content for your needs.
Every asset displays a thumbnail preview. For example, this image is for a video asset. Video assets will have the length of the video shown in orange in the top right corner (this asset is 57 seconds long). To preview the asset, double-click on it to watch it in a larger window.

This image is a thumbnail for an image asset. By default, all images will display on the screen for 15 seconds - as you can see is noted by the 15s in the gray in the top right corner. You can change how long an image stays on the screen by clicking the Settings button - AFTER it has been added into your program. Changing this will only change the length of that image in that program, not for other images, and not permanently for that image any other time it is inserted.

If you want to follow some more tutorials for new users, you can learn all the cool features and basics by clicking here http://autonettv.com/newuser.
Customer support service by UserEcho